Add/Update a Lesson (Module)
Applies to: Lite & Pro
Add/Update a Lesson (Module)
For: Teachers & Administrators
Build a written lesson with text, media, multimedia, and an optional PDF that students read inside a course. This article covers the lesson module editor — the page where you name a lesson, write its content, and attach a file.
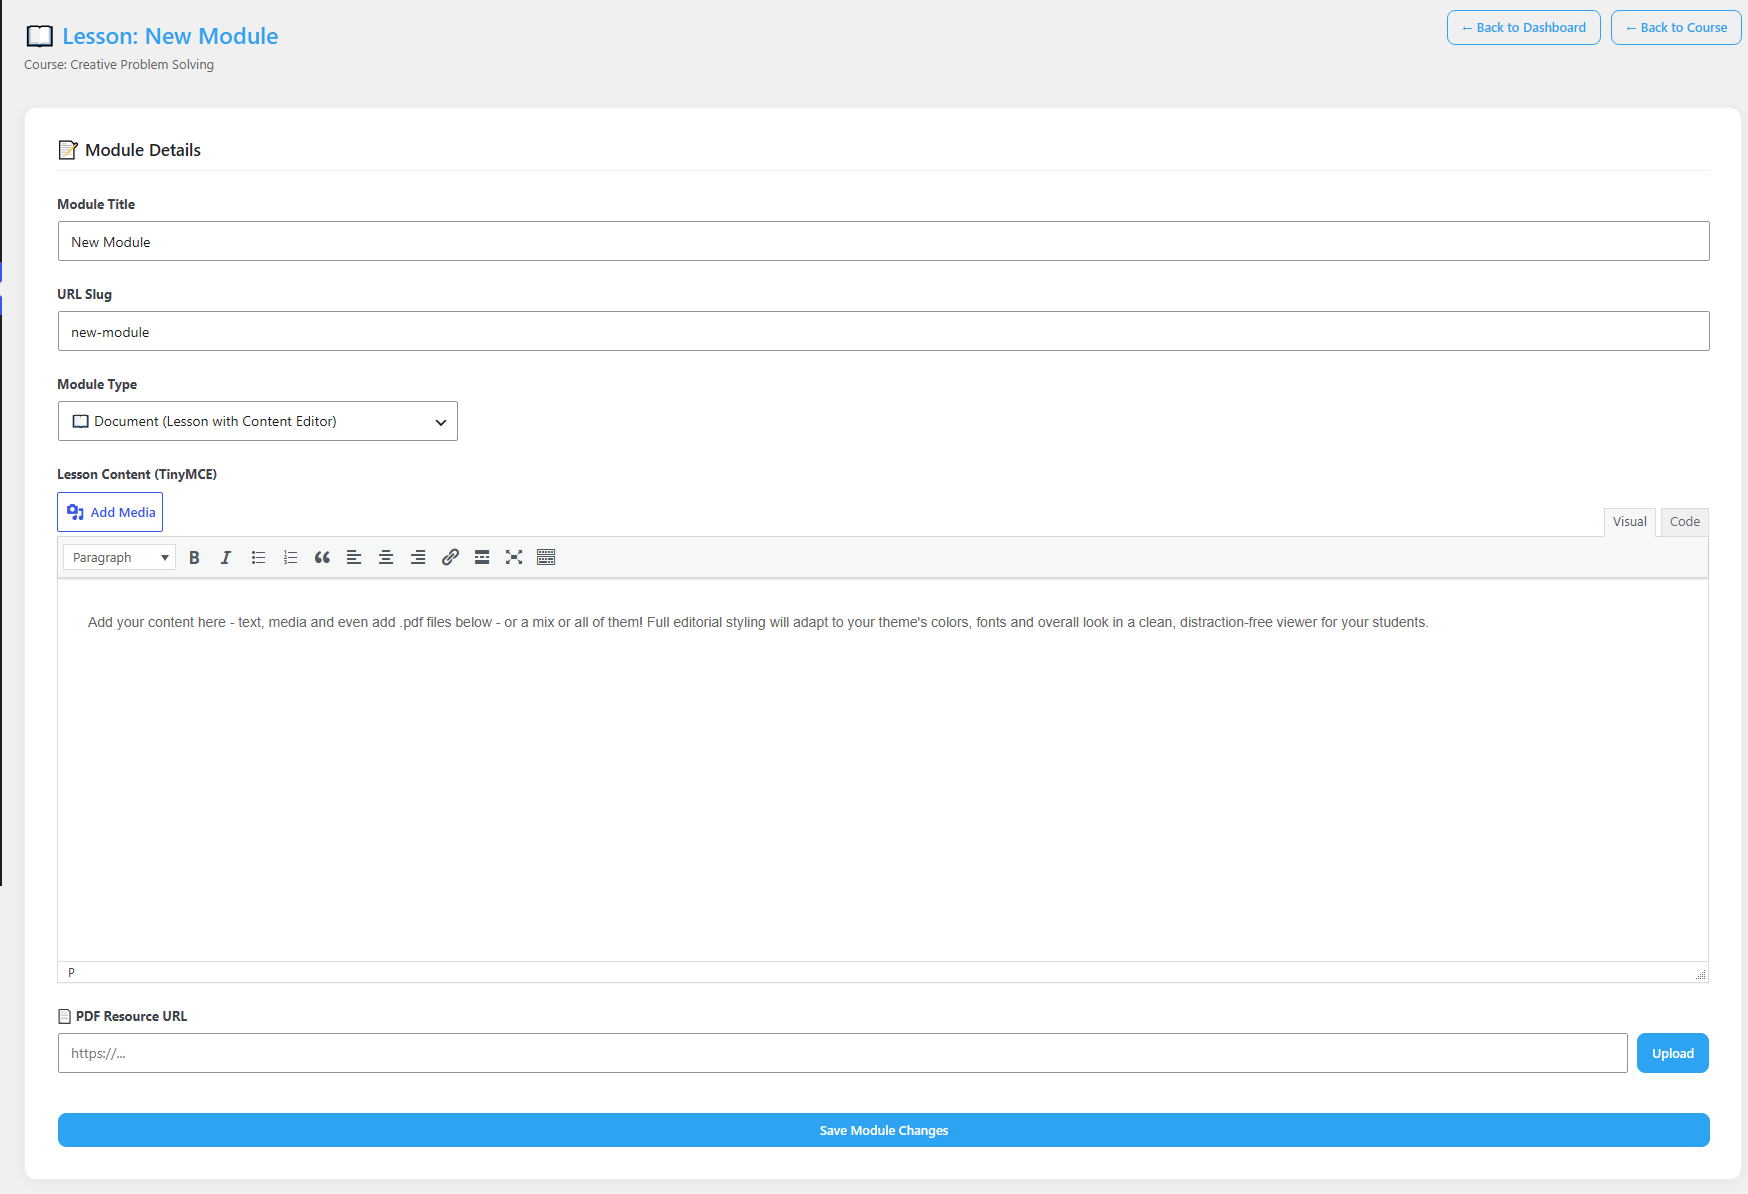
A lesson module is a page of learning content. On this screen you name the lesson, write its content in a familiar editor, and attach a PDF if you want. Your written content displays in a clean, distraction-free viewer for your students.
Before you start
- You are logged in as a Teacher or Administrator.
- The course exists and you are on its Edit Course or Add New Course screen, or you have opened the module directly.
Step-by-step
- Open the lesson. From the course’s Curriculum section, click + Add and choose Lesson, then click + Add to open the module — or click Edit next to an existing lesson module.
- Name it. In the Module Details section, type the lesson name in the Module Title field. The URL Slug fills in automatically from the title; you can change it, but it must stay unique.
- Confirm the type. In the Module Type dropdown, make sure it is set to “Document (Lesson with Content Editor)”.
- Write the content. In the Lesson Content area, click in the editor and type your lesson. Use the toolbar for Bold, Italic, lists, quotes, and alignment.
- Add media (images or video). Click Add Media. Your media library opens — choose the Add media tab, select the file, and once it loads click Add. You return to the module screen with the media inserted.
- Attach a PDF (optional). Click Upload (or Add Media) to open your media library, choose the Add media tab, select the PDF file, and once it loads click Add. The PDF must be uploaded to your site — you cannot link to a PDF hosted on another site. You return to the module screen with the PDF attached.
- Save it. Click Save Module Changes at the bottom. The lesson is saved and appears in the course curriculum.
What students see
When a student opens the published lesson, they see your content in a clean, distraction-free viewer, with a progress bar and navigation to move between lessons.

Tips & things to know
- The URL Slug is created from the title automatically; leaving it alone is the safest choice.
- The content editor works like a simple word processor — stick to the Visual tab unless you know HTML.
- The Code tab is for advanced users; most teachers never need it.
Pro Feature
Lessons work the same in Voltora Academy Pro. Pro adds no separate lesson builder; the content editor and PDF attachment behave identically in both versions.
Related articles
- Add a Course
- Edit a Course
- Add/Update a Quiz (Module)
- Add/Update Quiz Questions