Add a Course
Applies to: Lite & Pro
Add a Course
For: Teachers & Administrators
Create a new course in Voltora Academy so students can find it, enroll, and start learning. This article covers the course details screen — the page where you name the course, set its schedule, and start building its lessons.
A course is the container for everything your students will learn. On the details screen you set the basics — name, description, when it opens, and who teaches it. After you save the course details, you stay on the same page and build the lessons and quizzes right there, module by module.
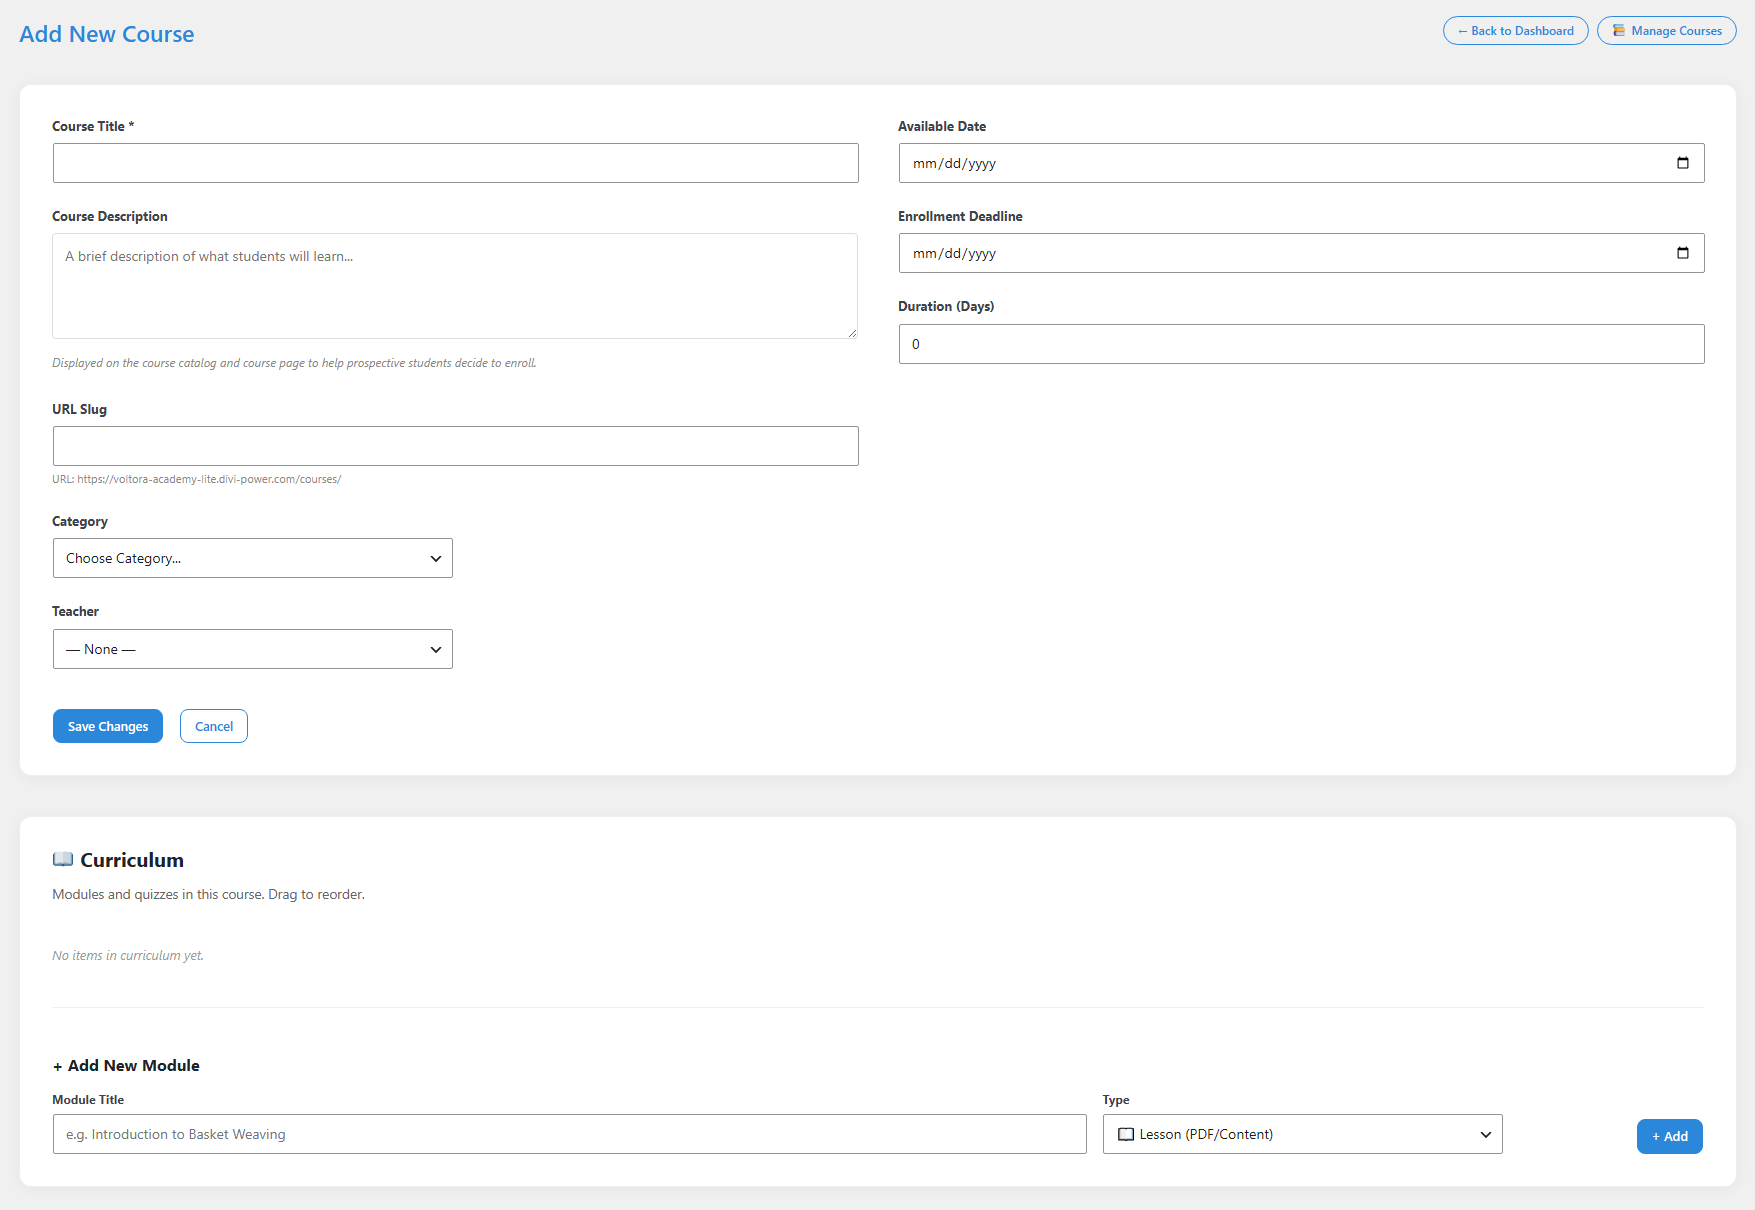
Before you start
- You are logged in as a Teacher or Administrator.
- The category you want to use already exists. If it does not, see Manage Categories first.
Step-by-step
- Open the Add New Course screen. From the WordPress dashboard, go to Voltora Academy → Add New Course.
- Name the course. In the Course Title field, type the name students will see (for example, “Introduction to Basket Weaving”).
- Write a short description. In the Course Description box, explain what students will learn. This text appears on the course catalog to help students decide to enroll.
- Set the schedule and details on the right side of the screen. Fill in as many of these as apply:
- Available Date — the day the course opens to students.
- Enrollment Deadline — the last day a student can enroll.
- Duration (Days) — how long the course runs. Leave it at 0 if there is no set end date.
- Category — the subject area the course belongs to.
- Teacher — the instructor assigned to teach it. Choose a name from the list, or leave it as “— None —” for now.
- Set the web address (optional but important). In the URL Slug field, you can leave it blank and Voltora Academy will create one from the course title automatically. If you enter one yourself, it must be unique — no two courses can share the same URL slug. If a slug duplicates an existing course, the address will not work correctly.
- Save the course details. Click Save Changes at the bottom of the details box. You stay on the same page, and the course now appears in Manage Courses.
- Build the curriculum on the same page. Scroll down to the Curriculum section. Type a name in Module Title, choose the Type (Lesson or Quiz), and click + Add. Each module is saved the moment you add it — you do not click Save Changes again.
- Reorder modules: drag a module up or down to arrange the course in the order you want.
- Edit a module: click Edit next to a module to open its settings and build out its content.
Tips & things to know
- Save Changes applies only to the course details box at the top. Once you are building modules in the Curriculum section, each module saves as soon as you add or edit it — no extra save needed.
- The URL Slug must be unique across all courses. Leaving it blank is the safest option; Voltora Academy assigns a slug from the title automatically.
- You do not have to add lessons right away. Save the details first, then build the curriculum whenever you are ready, all on the same page.
Pro Feature
In Voltora Academy Pro, courses can be tied to a WooCommerce product so you can sell them. The free Lite version offers unlimited free courses only. See Pro: Create a WooCommerce Course Product.