Manage Categories
Applies to: Lite & Pro
Manage Categories
For: Teachers & Administrators
Create and organize the subject areas your courses belong to. Categories help students browse and filter the course catalog, and they let you group related courses together.
A category is a label you attach to a course — for example “Beekeeping,” “Cooking,” or “Wellness.” You can keep categories flat (all at the top level) or nest them under a parent category to build a simple hierarchy.
Before you start
- You are logged in as a Teacher or Administrator.
- You are on the Manage Categories screen. From the Voltora Academy menu in your WordPress dashboard, choose Categories.
Add a category
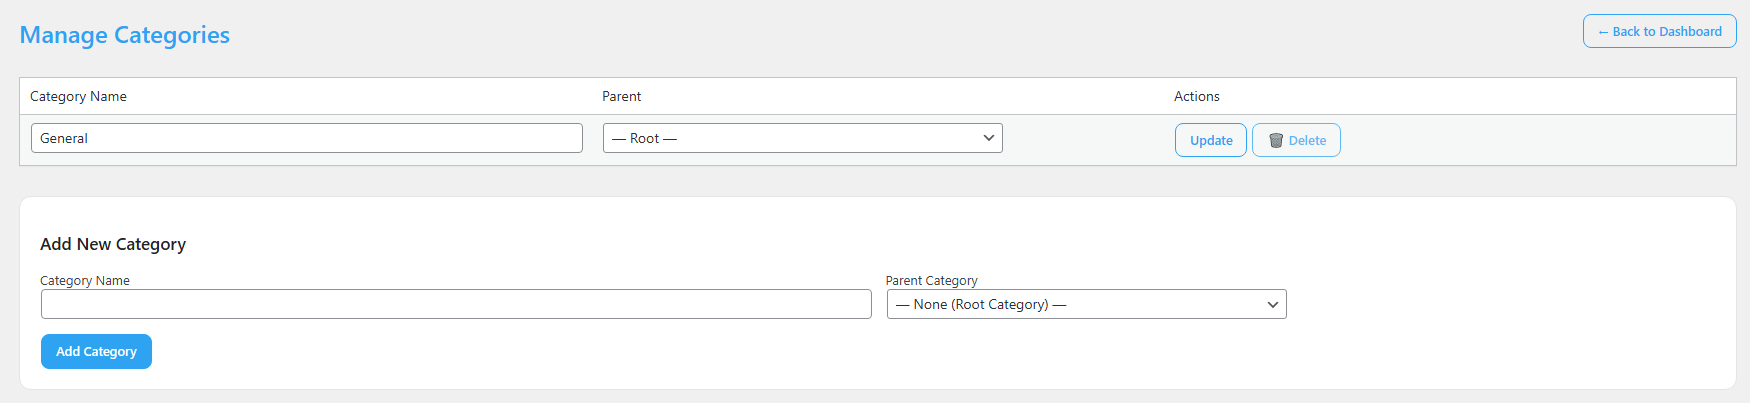
- Scroll to the Add New Category section.
- In the Category Name field, type the name students will see (for example, “Beekeeping”).
- Optional — make it a sub-category. Open the Parent Category dropdown and choose an existing category to nest this one beneath it.
- Click Add Category. The new category appears in the list above.
Edit or delete a category
- In the category list, find the row you want to change.
- To rename or re-parent: update the Category Name or Parent value in that row, then click Update.
- To remove it: click Delete next to the category. Deleting a category does not delete the courses in it — those courses simply lose that category label.
Tips & things to know
- Categories are shared across your whole academy, so a category created by one teacher is available to all.
- Most courses only need a handful of top-level categories. Start simple; you can add more later.
Pro Feature
Categories work the same way in Voltora Academy Pro. Pro adds richer course organization on the student-facing side (star ratings and category filters on the course marketplace), but creating and managing categories is unchanged.
Related articles
- Add a Course
- Edit a Course
- Manage Courses