Pro: Create a WooCommerce Course Product
Applies to: Pro
Pro: Create a WooCommerce Course Product
In Voltora Academy Pro, a paid course is sold through WooCommerce. The usual flow is: an Admin creates the WooCommerce product, then passes the Product ID to the teacher (or enters it on the course) so the course is linked to that product for checkout.
This article covers the Admin side — creating the product and connecting it to the course via the WooCommerce Product ID. (Free courses skip this and simply use Enroll Free.)
Before you start
- You are logged in as an Admin on a Voltora Academy Pro site with WooCommerce active.
- You have a Divi builder template for WooCommerce product page, cart and checkout.
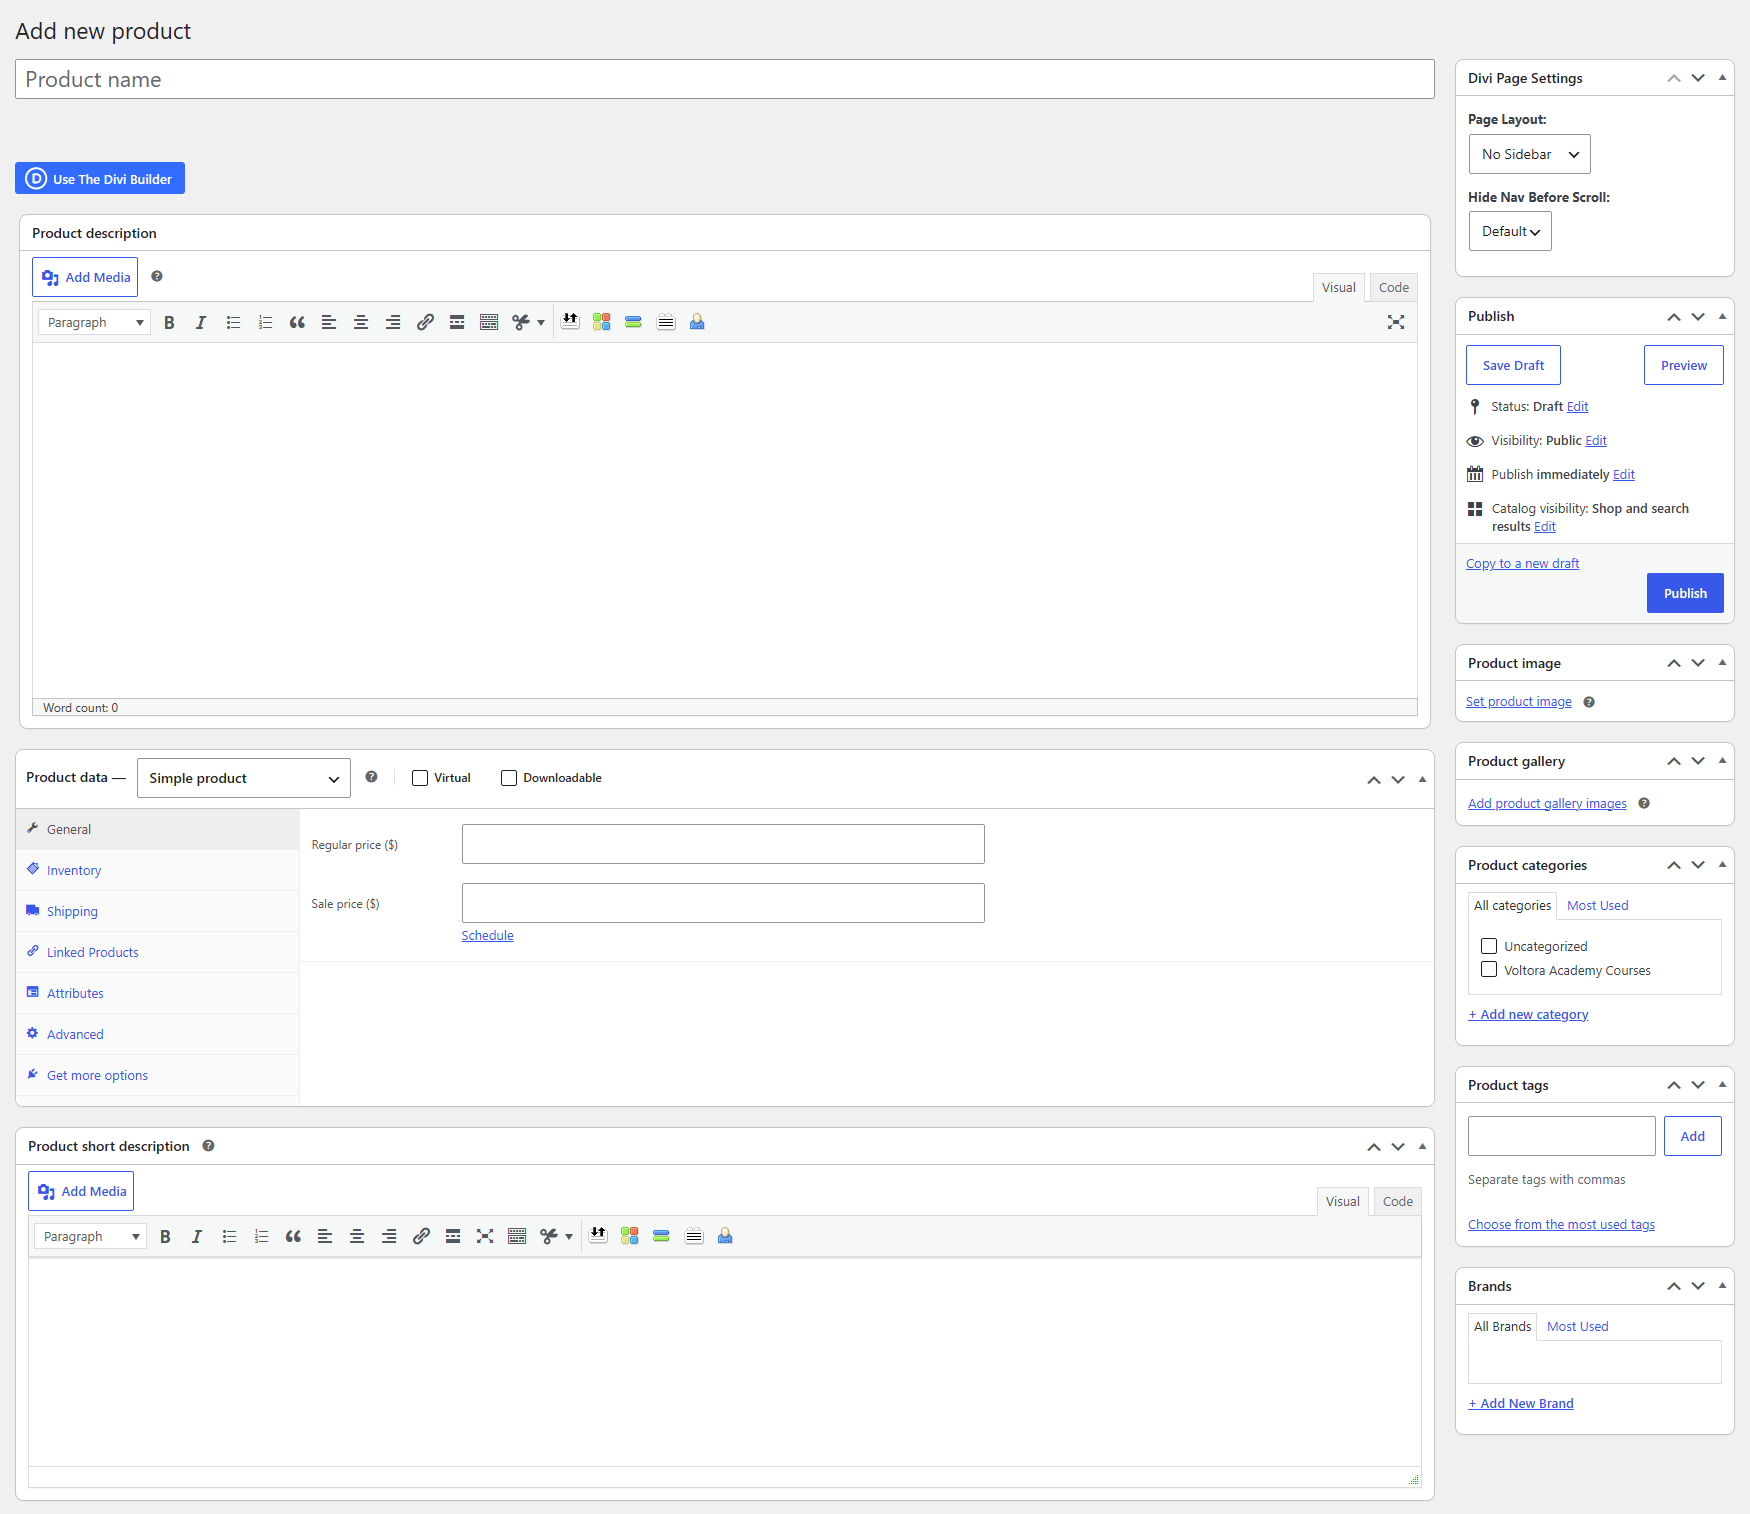
Steps — create a WooCommerce course product
- In the WordPress Admin, mouse over Products in the left menu.
- Click Add New Product.
- Enter the course title, full description, add images, enter a product short description (this is what shows up on search engines), category/ies, and tags. In the Product Data section choose Simple product and check the box for Virtual; set the price and/or sale price, and publish.
Go back to your Products screen, and hover your mouse over the course name. Right below the course name the product number will show. This is the product ID that will be entered into the WooCommerce Product ID field in Add New Course in Voltora Academy so you can earn revenue and paying students can enroll. Note the product ID.
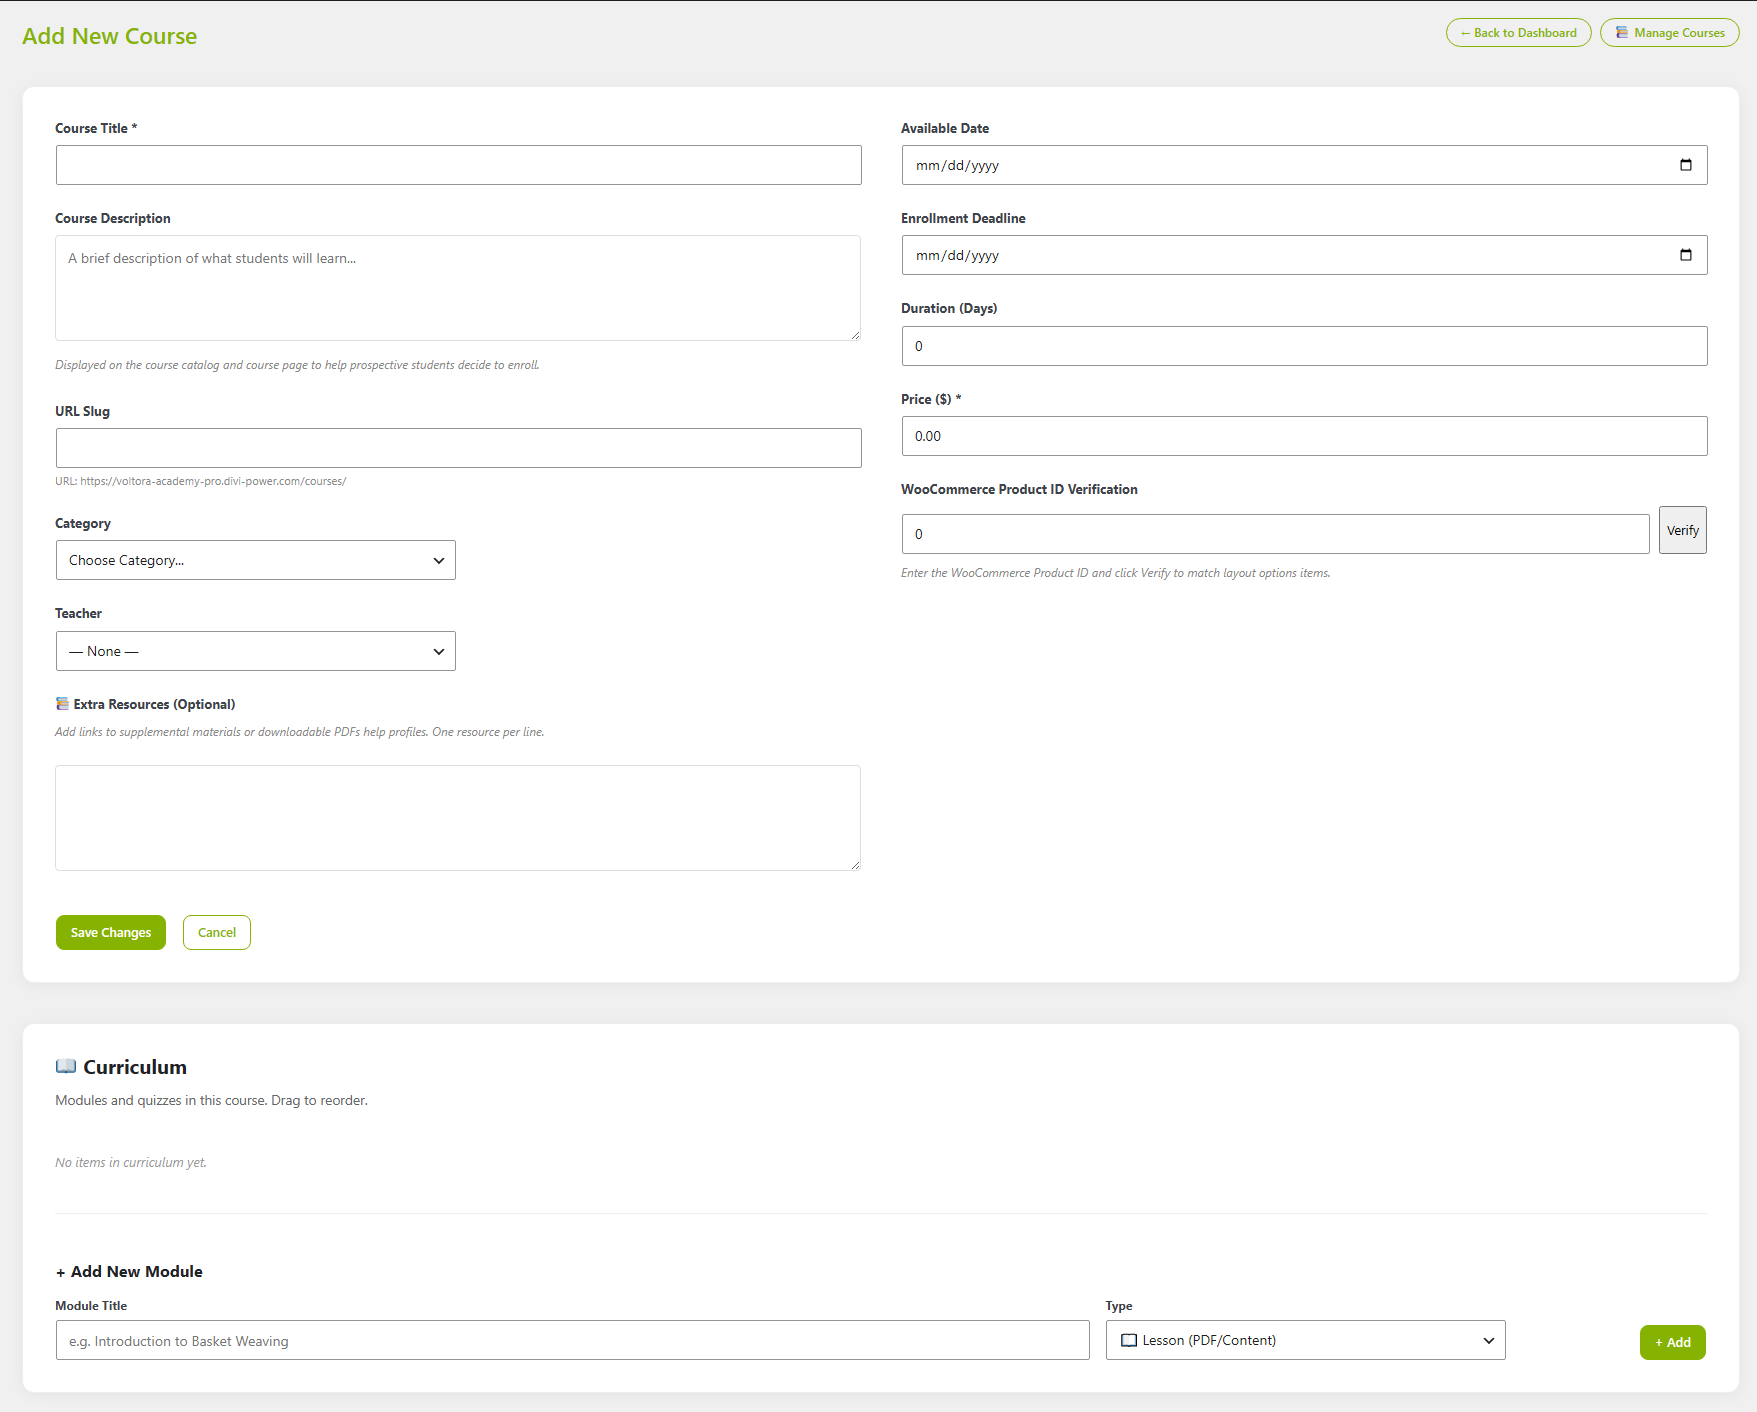
Steps — link a course to a WooCommerce product (Admin)
- From the Academy Management Dashboard, click + Add New Course.
- In the left column, complete Course Title *, Course Description, URL Slug, Category, and Teacher.
- In the right column, set the required Price ($) * field (for example, 59.99). Leave it 0.00 only for free courses.
- In the WooCommerce Product ID Verification field, enter the WooCommerce product's ID, then click Verify. Helper text: Enter the WooCommerce Product ID and click Verify to match layout options items.
- Set Available Date, Enrollment Deadline, and Duration (Days) as needed.
- Click Save Changes.
Steps — what the student sees at checkout
- On the catalog or course preview, a paid course shows Enroll Now (a free course shows Enroll Free →).
- Clicking Enroll Now goes to the WooCommerce product page; click Add to Cart, then open the Cart.
- Complete checkout — the student will enter their information and complete the checkout process.
- They will see the Registration screen where they will create their account and complete the enrollment. Their first and last name will be carried over.
- They will see a brief Welcome screen and then be directed to log in, then they'll be directed to the course hub where they can begin learning.
Tips & things to know
- A teacher's Add Course screen can verify/link a product by ID but typically does not set the price — that is the Admin's WooCommerce product.
- The WooCommerce Product ID Verification is what ties course content to the shop product for sale.
- To offer a coupon or bundle, see WooCommerce documentation.
Related articles
- Student: Enroll in a Course