RSVPify: Create an Event
Applies to: PowerTools Suite & Conversion Deck
RSVPify shows your event details and an RSVP form on a page. Guests get a confirmation ID, and you manage the guest manifest in admin, including check-in at the door and CSV export.
Before you start
- Have your event name ready. Location, capacity, date, and start time are optional.
Step-by-step
Create the event
- Open RSVPify. In WordPress admin, go to PowerTools Suite → RSVPify and click Add an event.
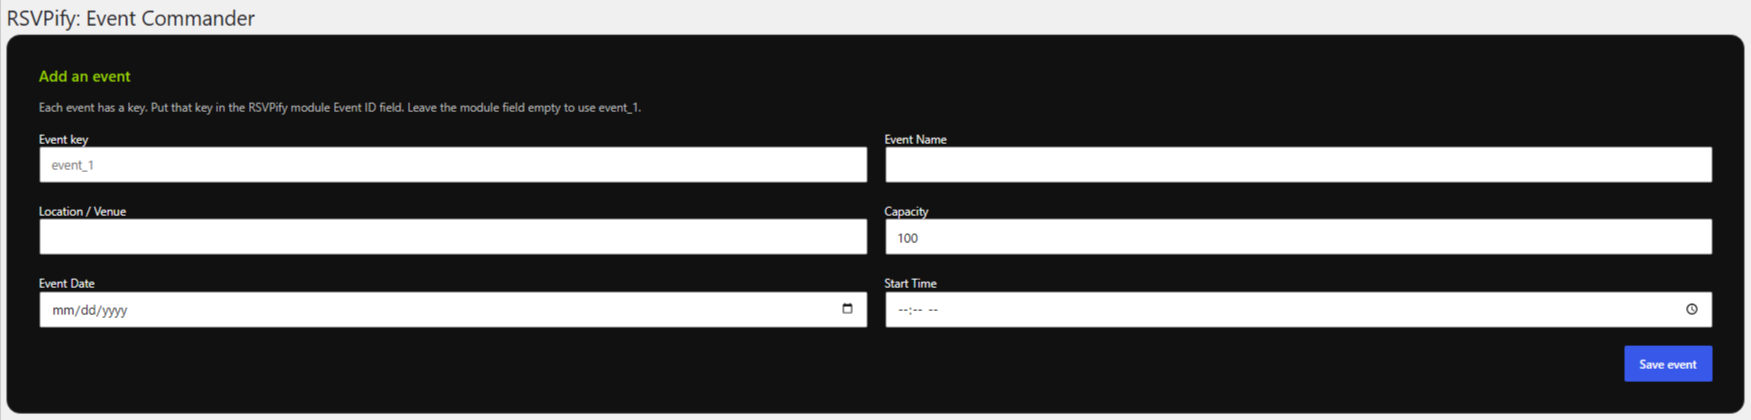
- Fill in the Name. It's required. Location, Capacity, Date, and Start Time are optional.
- Leave Event key blank. RSVPify creates the key for you (event_1, event_2, and so on). If you type your own key, it's changed to lowercase with hyphens, and a key that's already used is rejected.
- Click Save event.
- Note the event key in the Events table. You'll need it for the module.

Show the event on a page
- Edit the page in the Divi 5 Visual Builder and insert the RSVPify module. In the Visual Builder the module shows a placeholder box. The real event details and RSVP form show on the live page.

- Type the exact event key into the module's Event ID field, for example
event_2. If you leave it blank, the module usesevent_1. The title and the Show Email Field switch are optional.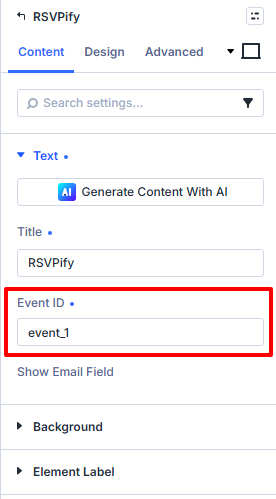
- Save. When guests RSVP, they appear in the Verified Guest Manifest once you pick that event under Show guests for.
Tips & things to know
- Type the whole key. Typing just
1does not meanevent_1, even though the Visual Builder preview says "Event #1". - A wrong key still shows a form. It's headed No event saved for "x" (where x is what you typed), and submitting it says the event is not taking RSVPs. Check the key in the Events table and fix the Event ID field.
- Deleting an event removes the event, but its guest rows are kept.
- To add many guests at once, use PowerTools Suite → PowerPort and choose RSVPify Attendees.
What it does not do
- It does not sell tickets or take payment.